
KineMaster MOD | Is it the Best Mobile Editor?
The category for video editing has got to be the one with the greatest number of applications. A simple search on the Play Store will yield a vast array of video editing apps. In addition, each of these apps has received a good number of positive reviews in addition to a respectable rating. Each of these sows doubt in the minds of the users. Thus, it finally results in a perplexing situation where they have to decide which app to use.
To reduce your confusion, we tested a few different video editing apps and discovered that Kinemaster was able to perform the majority of the fundamental features with ease. Although you may have to pay a few dollars for some extra features, the essential functions are free. Now, without further ado, let’s examine the app’s features, interface, and user manual.
What is KineMaster MOD Digitbin?
With its advanced cutting and trimming capabilities, KineMaster is an all-inclusive professional video editor for Android that allows you to work with multiple layers of video, images, and text. It also offers free features like multi-track audio, volume envelope control, 3D transitions, chroma keys, animations, effects, and visual effects.
App Interface and Usability
There are three options available to you when you launch the app: either make a new video, go to the app’s YouTube channel, or browse the store to find more font styles, themes, animations, and assets, among other things. If this is your first time using the app, you can skip over the asset section and begin your project by tapping the central icon.
Basics
First, you need to choose the aspect ratio of the video: 16:9 provides the landscape mode, 9:16 the portrait mode, or a custom 1:1. The next menu splits your screen in half; you should currently be focusing on the upper half. Choose the preferred video or videos that require your action. The bottom half will then contain all of your selections. You can choose which of your videos you want to act upon further.
Operations
You could, for instance, remove or trim it, pan or zoom, or change the audio. Three other options are available in addition to that: clip graphics, speed, and reverse. You can apply effects to the chosen section of the video by using the first option. The built-in effects are also pretty amazing, but if you want to go above and beyond, their store has a ton of additional content (both paid and free).
The following feature, called speed, allows you to adjust the video’s speed to suit your needs. After that, some additional options will appear on a circular wheel. The media—audio, voice, and layer—are these.
Video Layer Support
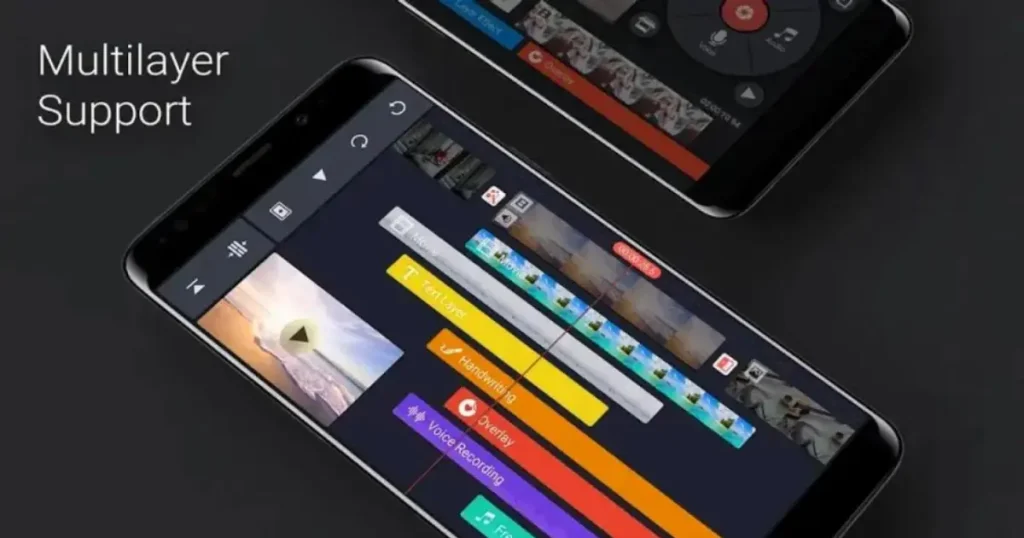
You can add more videos to the current batch using the Media option. While the voice functionality lets you record and add your voice, the audio feature lets you add custom sounds. The Layer feature is another, and it has some intriguing settings. Any feature you select from this section will, as the name implies, be applied as a layer on top of your video.
Miscellaneous Features
Many other features available in the app, such as Out and In Animations, Chroma Key, Cropping Reverse, Opacity, Color Filter, Reverb, Voice Changer, Mirroring, and more, allow you to further customize this added video. Remember that the Store section offers a plethora of additional assets for each of these categories.
Once all of the customizations have been made, click the Play icon to see a preview of your video, and then tap the Share icon to open the Export and Share window. To save this clip, simply choose your desired resolution (from SD 540P to 4K 2160p quality), frame rate (12 to 30), and bitrate, then click the Export button.
Chroma Key
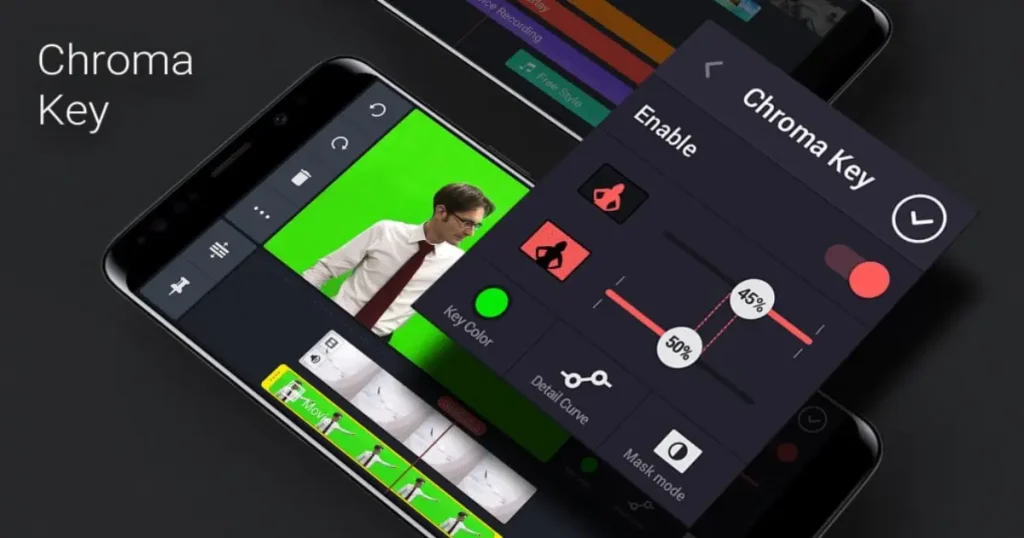
A visual effects method for combining two images or video streams is called a chroma key. The method of removing a background from the subject of a picture or video has been applied in numerous fields. It is useful to overlay an image or video layer on top of any pre-existing media file. With your mobile device, you can generate superior visual effects using the chroma key option.
Audio Balance
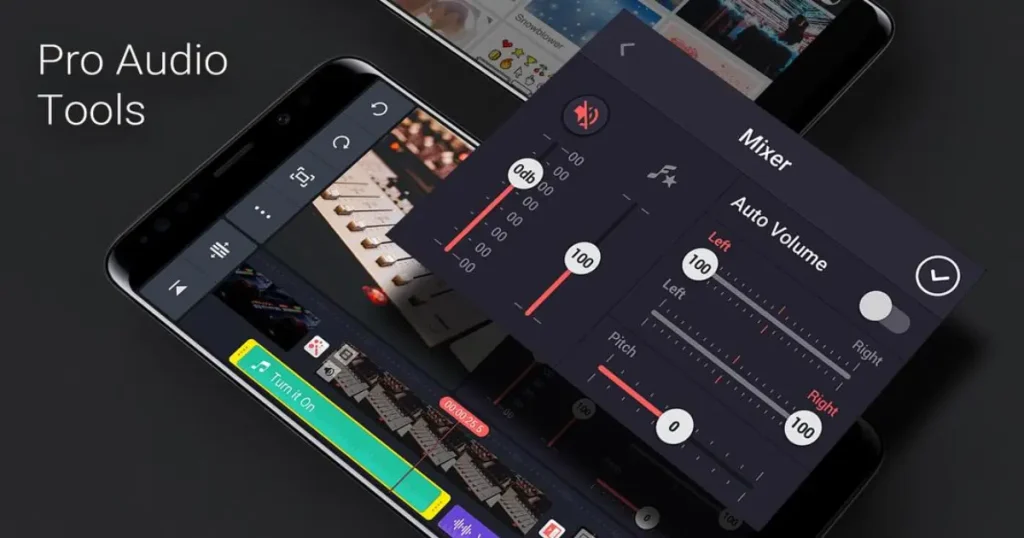
For improved audio output, the app includes a variety of sophisticated sound settings, including equalizer, voiceover, audio envelope, pitch settings, audio mixer, template mixer, bass settings, and audio enhancers.
Pricing Strategy
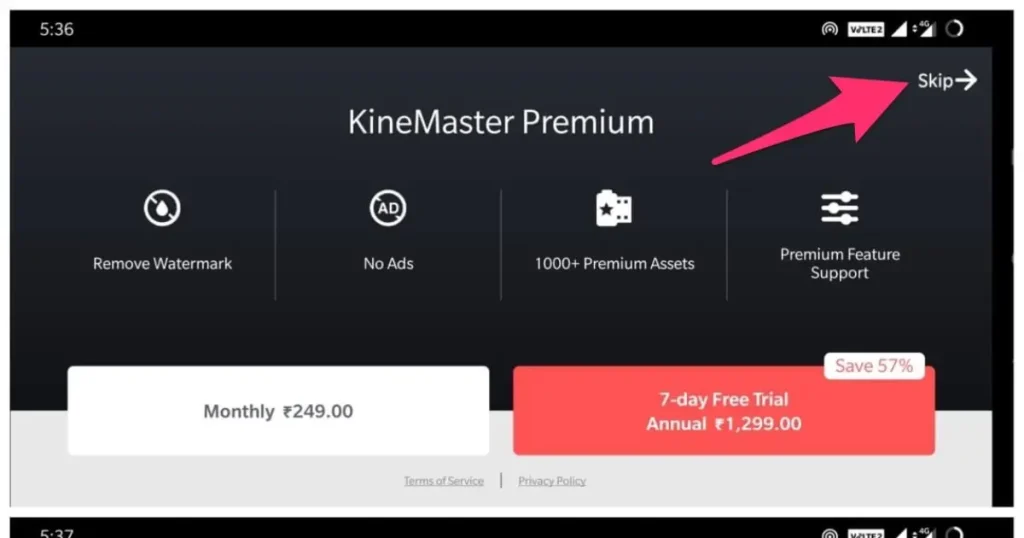
By default, the KineMaster watermark will appear in all of your videos. You can either remove them for about Rs. 249 a month or try them free for seven days, after which you’ll have to pay about Rs. 1299 a year. In addition, the premium version offers you a Premium Features Support window, over a thousand Premium Assets, and the removal of advertisements.
Simply click the Skip button in the upper right corner to start the export process if you would rather not test out the Premium version. Depending on the video’s size, bitrate, quality, and resolution, this could take some time. All of the videos you’ve made will be accessible on the right-hand screen, where you can choose to watch, remove, or share them on your favorite social media platforms.
Other Useful Features
Now let’s examine some of KineMaster’s other notable features.
Elegant User Interface
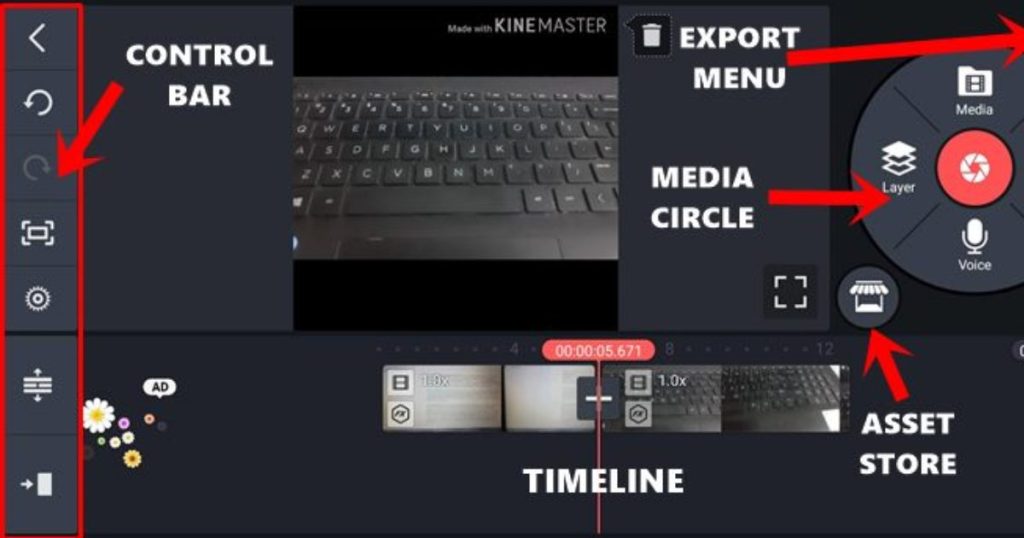
It was always going to be difficult to strike a balance between the abundance of features at stake and a simple user interface. Still, it appears that the app performed fairly well in this area. The video you are editing is in the center of your screen. There is a control bar with some advanced functionality on the left side that contains options like redo, undo, share, and project settings.
The options to add video, audio, another piece of media from your gallery, or a layered video on top of the one that is already there are then displayed by a Media Circle at the top right. The Asset Store is located on the bottom left of this Media Circle, and the Play button is located on the right. Its top-right corner gives you the ability to export your work.
The timeline, located in the bottom bar, lists all of the videos you are currently working on along with their durations, edits, and added layers. Additionally, you could tap on any video in the timeline to open the editing toolbox for that particular video.
Real-Time Editing Capabilities
This is perhaps among the most useful features of the app, giving you the ability to edit audio and videos on the go. You could keep recording the video and, at the same time, try out the app’s editing capabilities. Apart from that, you could even add a second layer of audio or clip. All this is done in real time, without the need to even finish your recording.
Video Adjustment Tools
Users have access to an abundance of video adjustment tools. You can easily adjust the brightness, saturation, warmth, and color correction to give your videos a rich, uniform appearance.
Asset Store
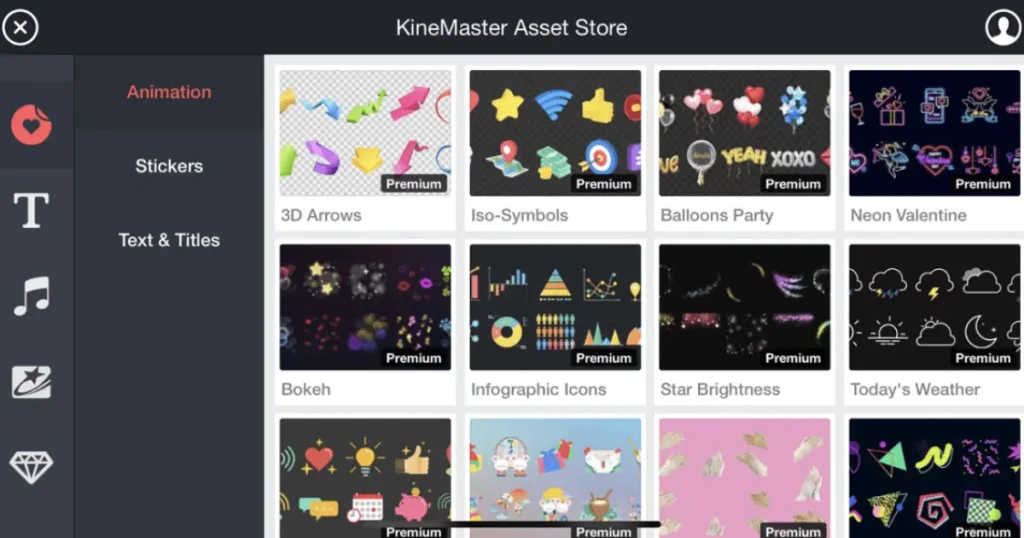
Even though the app itself has a ton of customization options, you can visit the Store to add even more. Additionally, not every item in the store is paid for; you may still be able to obtain respectable assets for free.
Layered Editing Capabilities
When it comes to superimposing a second layer of video or audio clip over the first, the app has some clever tricks up its sleeve. You can modify the layered video’s dimensions and position, as well as add unique animations, sounds, and transition effects for the second layer while maintaining the integrity of the first layer. This provides your two videos with distinct identities. You could even add stylized text to your video or doodle over it using the Handwriting tool and Text feature.
However, if your main clip already has a transition, don’t add too many more to the secondary video. It could land on the incorrect side and become more animated than necessary. Additionally, the application blends these two layers in a way that makes it difficult to differentiate between them. In this segment, it has undoubtedly managed to score some brownie points.
Social Media Integration
It is not at all obvious that once you have created something, you will want to share it on as many social media platforms as possible. It appears that the app has noticed that as well. You can share your work on numerous apps, including WhatsApp, Telegram, Instagram Story, Feed, YouTube, and more, using the Export Video screen. Considering that switching between apps isn’t necessary, this direct method of sharing your work saves a ton of time.
Concluding Remarks
To sum up, all of this information was obtained from the KineMaster Video Editor app guide. The app has made sure that, despite having a ton of helpful features, the user interface doesn’t become overly cluttered. In addition, as previously stated, there are a ton of additional apps in this category. However, this is the most feature-rich video editor app available, with hassle-free editing options and an intuitive user interface.
In light of that, we’d be interested in knowing what you think of this app. Have you settled for anyone else’s application, or is this your first choice? Post your thoughts in the space provided for comments below.
Please use the comment box below to share your thoughts on KineMaster Review: The Video Editor You Can’t Ignore. For more tutorial videos, kindly subscribe to our DigitBin YouTube channel. Salutations!
Similar topics